
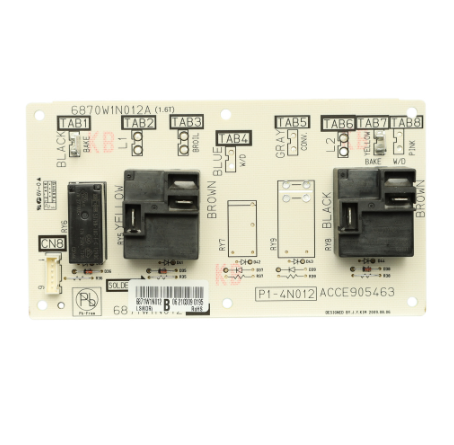
LG 6871W1N012B Range Oven Relay Control Board

Special Price $134.16 Regular Price $152.78
In stock
Available Quantity:   45
SKU
6871W1N012B

Product Description

LG 6871W1N012B Range Oven Relay Control Board responsible for controlling flow of power to various components of oven, thereby maintaining proper temperature and functionality. It work by accepting signal from the control panel and switching voltage to heating elements, igniters and fans where necessary. This coordination ensures that heat is evenly distributed and the cooking process. This relay control board also helps to enhance the cooking quality as well as the durability and safety of the appliance through efficient energy usage and proper functioning.
Manufacturer

https://www.hnkparts.com/media/catalog/product/6/8/6871w1n012b_lge_hnkparts.png
Manufacturer Name: LGE
Product Number: 6871W1N012B
OEM Part Number: 6871W1N012B
Product Description: Pcb Assy-Sub

Choose the best Home Appliance parts and supplies from HnKParts!

  • Same Day Shipping

  • Best Quality And Best Price

  • Wide Range of Inventory

  • Best Customer Service

Have More Questions or Need Help to Place The Order?
Reach us at (866)723-0907 or [email protected]

Write Your Own Review
You're reviewing:LG 6871W1N012B Range Oven Relay Control Board
Your Rating
Customer Questions
What maintenance is required for the LG 6871W1N012B Relay Control Board?

Regularly inspect the range control board for loose connections and signs of overheating. Keep the area dust-free and avoid moisture exposure. Ensure all wires are securely attached, and disconnect power before any checks to prevent electrical hazards.

What are common issues with the LG 6871W1N012B Relay Control Board?

  • Oven not heating properly.
  • Erratic temperature control.
  • Failed or unresponsive relay switches.
  • Display errors or fault codes related to heating elements.

Installation Steps

Step1: Disconnect power at breaker, remove rear panel for access.

Step2: Take note of wiring harness for reference.

Step3: Unplug connectors from old relay board carefully.

Step4: Remove mounting screws and extract board.

Step5: Install new board and secure screws.

Step6: Reconnect harness as labeled and ensure tight fit.

Step7: Restore power and test functions safely carefully.