The store will not work correctly in the case when cookies are disabled.
We collect user information to provide a better user experience and protect the security of our website. By continuing to use our website, you acknowledge the use of cookies.
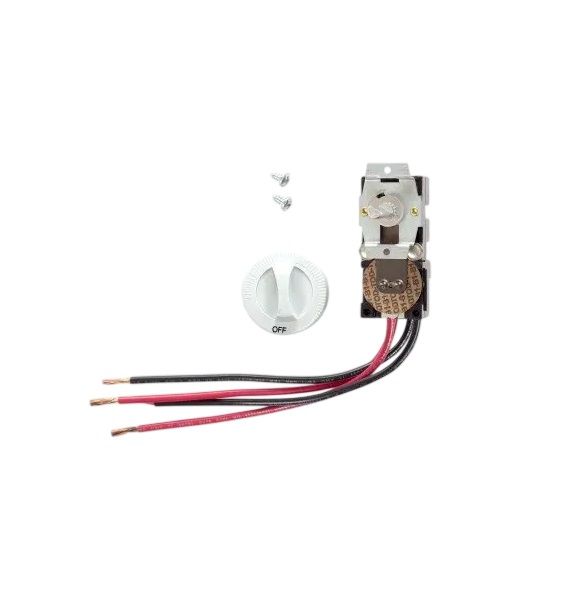
The Cadet Manufacturing Company 67064 Electric Wall Heater Thermostat DP White CTT2W CMPC is used to monitor and control the temperature in the room using power to the electric heating system. It is mounted on a wall, where it is connected to the electrical circuit of the heater and the control wiring. The thermostat detects the ambient temperature and turns on or turns off the heater depending on the set points. It assists in the regular operation of room heating, against excessive loads on the components, and reliable control of the heating system, allowing stable temperatures throughout the usual working cycles of the component.
Step 1: The power supply to the heating/cooling system should be disconnected by flipping the switch on the circuit breaker box.
Step 2: The current thermostat should be removed from the wall by unscrewing it. The old thermostat should be disposed of.
Step 3: The Cadet Manufacturing 67064 Cadet Thermostat Kit should be gently unpacked. It should ensure that all components are inspected.
Step 4: The wires attached to the existing thermostat should be identified and labeled to assist with installation.
Step 5: The wires should be attached to the new thermostat, aligning the colored wires with their respective letter designations on the terminal screws.
Step 6: The thermostat should be secured to the wall using the included mounting screws.
Step 7: It should be verified that the wires are correctly connected and power should be restored to the heating/cooling system.
Step 8: The thermostat's functionality should be verified by adjusting the temperature setting and ensuring that the system operates as intended.
Step 9: If all is functioning properly, your new Cadet Manufacturing 67064 Cadet Thermostat Kit should be enjoyed.
Please remember that these instructions are intended for general assistance and should always be utilized alongside the manufacturer's manual, if available.