
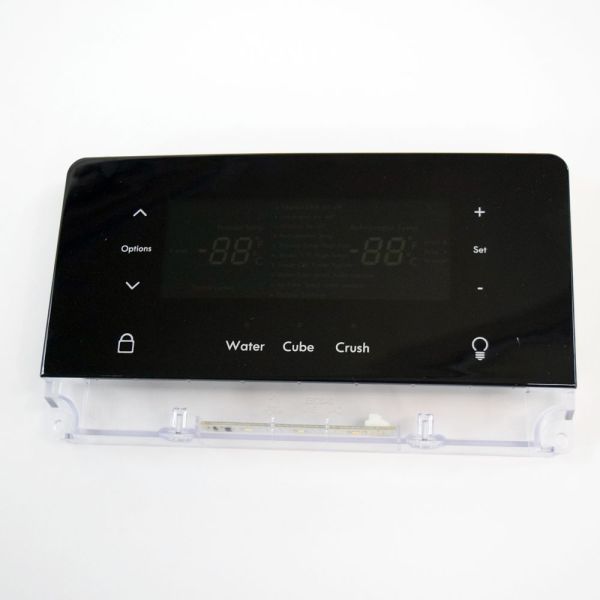
Frigidaire 5304508115 Refrigerator Control Assembly

Special Price $187.23 Regular Price $210.95
In stock
Available Quantity:   21
SKU
5304508115

Product Description

The Frigidaire 5304508115 Refrigerator Control Assembly operates by controlling the compressor and fan, so as to regulate the internal conditions. The assembly also regulates the cooling cycle to avoid the change of temperature. Some of the advantages are increased energy efficiency and uniformity in cooling that aids in food preservation. This control assembly also increases the efficiency in the performance of the refrigerator.
Manufacturer

https://www.hnkparts.com/media/catalog/product/5/3/5304508115_frigidaire_hnkparts.png
Manufacturer Name: FRIGIDAIRE
Product Number: 5304508115
OEM Part Number: 5304508115
Product Description: Control Assembly

Choose the best Home Appliance parts and supplies from HnKParts!

  • Same Day Shipping

  • Best Quality And Best Price

  • Wide Range of Inventory

  • Best Customer Service

Have More Questions or Need Help to Place The Order?
Reach us at (866)723-0907 or [email protected]

Write Your Own Review
You're reviewing:Frigidaire 5304508115 Refrigerator Control Assembly
Your Rating
Customer Questions
What maintenance is required for the Frigidaire 5304508115 Control Assembly?

Regularly inspect the refrigerator control assembly for signs of wear or loose connections. Keep the area clean from dust and spills to ensure proper operation. Avoid moisture contact and handle components carefully to prevent electrical hazards. Check settings periodically for correct temperature control.

What are common issues with the Frigidaire 5304508115 Control Assembly?

  • Inconsistent cooling or temperature fluctuations.
  • Failure to start the compressor.
  • Erratic operation of fans or defrost cycle.
  • Electrical connection problems causing intermittent operationality.

Installation Steps

Step1: Unplug refrigerator and empty contents for electrical safety before starting.

Step2: Remove control housing panel carefully using screwdriver, avoid damaging clips.

Step3: Disconnect wiring harness, noting connections for correct reassembly.

Step4: Install new control assembly and secure mounting screws tightly.

Step5: Reconnect wiring and ensure firm fit.

Step6: Restore panel, power on, and test temperature settings safely.

Step7: Wait a few minutes and verify cooling performance and proper operation.