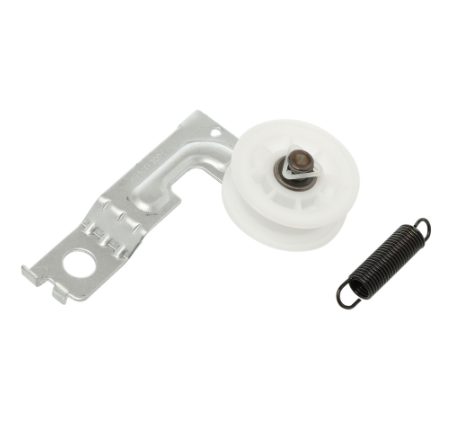
This Part Fits the Following Models (304)
LG Dryer Idler 4561EL3002A Pulley Replacement
The LG Dryer Idler 4561EL3002A Pulley Replacement will help improve the operation of your LG dryer. This pulley, designed with precision engineering, provides smooth rotation and reduces wear and tear on your appliance. Its sturdy design ensures long-term dependability, giving you tranquillity of assurance with your laundry demands. Say goodbye to noisy operation and inconsistent drying; this replacement pulley restores your dryer's functionality to its full potential. Installation is a pleasure, thanks to its user-friendly design, which allows you to easily improve the efficiency of your appliance. The LG Dryer Idler 4561EL3002A Pulley Replacement provides constant performance, making your washing routine easy and hassle-free.
Key features of LG Dryer Idler 4561EL3002A Pulley Replacement:
-
Durable construction: Crafted from high-quality materials for long-lasting performance.
-
Smooth operation: Ensures the smooth rotation of the dryer drum for efficient drying.
-
Easy installation: Designed for hassle-free replacement, saving time and effort.
-
Precise fit: Engineered to match the specifications of LG dryers for optimal functionality.
-
Reduced noise: Helps minimise operational noise for a quieter laundry experience.
-
Reliable performance: Provides dependable support to maintain the functionality of your dryer.
Installation Steps
Step 2: The top section of the dryer should be lifted and supported with a block or a similar object.
Step 3: The old idler pulley should be detached by utilizing a ¼-inch nut driver to loosen the two bolts securing it.
Step 4: The belt should be taken off from the pulley and subsequently the idler pulley assembly should be extracted.
Step 5: The new 4561EL3002A LG Dryer Idler Pulley Assembly should be positioned and secured by tightening the two bolts with the nut driver.
Step 6: The belt should be re-threaded through the pulley, ensuring it is snug and properly secured.
Step 7: The top of the dryer should be gently lowered and reconnected to the power source.
Step 8: It should be verified that the dryer operates correctly and the belt is functioning without any issues.
Please note that these instructions should be served as general guidance and should always be referenced alongside the manufacturer's manual, if available.
