
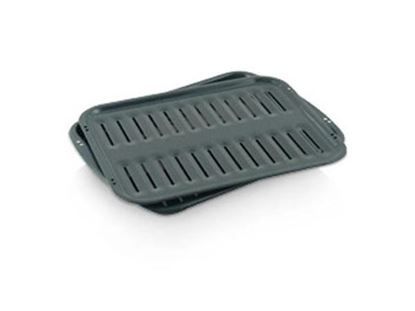
Whirlpool 4396923 Range Broiler Pan & Roasting Rack

$20.12
In stock
Available Quantity:   81
SKU
4396923

Product Description

The Whirlpool 4396923 Range Broiler Pan & Roasting Rack helps in the proper heating of food by providing a passage for heat to pass through the food. It is made of steel that is heat resistant and the top is designed with slits for simple removal of fats. It is ideal for heat distribution to ensure the browning and crisping of the food to achieve better results in cooking.
Manufacturer

✓ This Product Replaces: 06473900E, 06474000E, 304451E, 314175CG, 31793602CG, 19950034, 3401F016-19, 3413F013-19, 4378383, BP3600, R0156548, R0710189, R0710196, R1565-48, R1565048
https://www.hnkparts.com/media/catalog/product/4/3/4396923_whirlpool_hnkparts.jpg

This Part Fits the Following Models (967)

KitchenAid YKEBC278KB0 Oven KitchenAid YKEBC278KM0 Oven KitchenAid YKEBC278KW0 Oven KitchenAid YKEBS107DB6 Oven KitchenAid YKEBS107DB7 Oven KitchenAid YKEBS107DM6 Oven KitchenAid YKEBS107DM7 Oven KitchenAid YKEBS107DS6 Oven KitchenAid YKEBS107DS7 Oven KitchenAid YKEBS107DT6 Oven KitchenAid YKEBS107DT7 Oven KitchenAid YKEBS107DW6 Oven KitchenAid KERC507EWH3 Range KitchenAid KERC507EWH4 Range KitchenAid KERC607HWW8 Range
Showing 1-15 of 967
Manufacturer Name: WHIRLPOOL
Product Number: 4396923
OEM Part Number: 4396923
Product Description: Porcelain Broil Pan

Choose the best Home Appliance parts and supplies from HnKParts!

  • Same Day Shipping

  • Best Quality And Best Price

  • Wide Range of Inventory

  • Best Customer Service

Have More Questions or Need Help to Place The Order?
Reach us at (866)723-0907 or [email protected]

Write Your Own Review
You're reviewing:Whirlpool 4396923 Range Broiler Pan & Roasting Rack
Your Rating
Customer Questions
No Questions

Installation Steps

Step1: Ensure the range is turned off and completely cool before handling components.

Step2: Open the oven door and remove any existing pan or rack.

Step3: Place the new roasting rack securely inside the pan, making sure it sits level.

Step4: Slide the assembled pan and rack onto the proper oven rack position.

Step5: Confirm the assembly is centered and stable.

Step6: Close the oven door and test the fit.