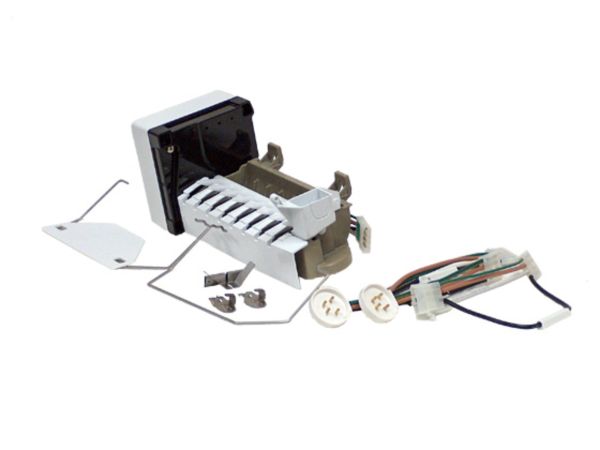
This Part Fits the Following Models (725)
Whirlpool Refrigerator Ice Maker Assembly Crescent Cube 4317943
The Whirlpool Refrigerator Ice Maker Assembly Crescent Cube 4317943 enhances the functioning of your refrigerator by providing a steady supply of crescent-shaped ice cubes. This authentic Whirlpool component guarantees dependability and compatibility, ensuring a smooth connection with your stove. You may easily and rapidly upgrade your refrigerator with its simple installation technique. This ice maker assembly ensures dependable performance and endurance by using precision engineering and robust materials, so you can always have ice on hand for your cold treats or beverages. Enjoy the simplicity of automatic ice manufacturing. For entertaining guests or just enjoying a cool beverage, the Whirlpool 4317943 Refrigerator Ice Maker Assembly Crescent Cube makes sure you're ready for everything. Rely on Whirlpool's quality and innovation-driven reputation to improve your refrigerator experience. Get this authentic component to ensure that your refrigerator is always filled with ice, offering convenience and assurance for all of your home's requirements.
Key Features for the Whirlpool Refrigerator Ice Maker Assembly Crescent Cube 4317943:
-
Genuine Whirlpool Part: Ensures compatibility and reliability.
-
Crescent Cube Design: Produces crescent-shaped ice cubes for versatile use.
-
Easy Installation: Straightforward setup for hassle-free integration.
-
Durable Construction: Crafted with quality materials for long-lasting performance.
-
Consistent Ice Production: Provides a consistent amount of ice for your beverages.
Installation Steps
Step 2: The control panel cover situated at the top of the refrigerator is found and detached. This is achieved by utilizing a Phillips screwdriver to take out the screws securing the cover.
Step 3: The ice maker assembly within the refrigerator is identified. A flathead screwdriver is employed to loosen and take out the screws that are affixing the assembly.
Step 4: The power supply is unplugged from the wall outlet.
Step 5: The ice maker assembly is carefully extracted from the refrigerator.
Step 6: The new ice maker assembly is positioned by matching the holes in the bottom plate with the pins in the refrigerator. The assembly is fastened using the flathead screwdriver.
Step 7: The power supply is reattached to the wall outlet.
Step 8: The control panel cover is reinstalled and secured using the Phillips screwdriver.
Step 9: The refrigerator is reconnected to the power and turned on.
Step 10: The ice maker assembly is verified to ensure it operates correctly.
Please note that these instructions are served as general guidance and should always be used alongside the manufacturer's manual, if it is available.
