
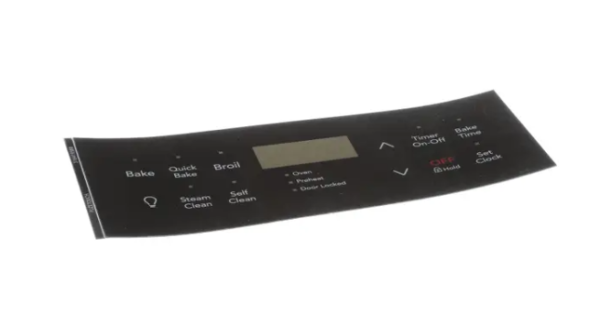
Frigidaire 316419388 Range Overlay

Special Price $32.16 Regular Price $34.70
In stock
Available Quantity:   57
SKU
316419388

Product Description

The Frigidaire 316419388 Range Overlay functions in a way that it offers a protective shield to the control unit that is simple to use. This overlay includes all the control functions names to help users make the right changes. It make the appliance more functional by labeling each button with a description. The product is aimed at enhancing the usability of the appliance to ensure that the user does not make mistakes when operating it.
Manufacturer

https://www.hnkparts.com/media/catalog/product/3/1/316419388_frigidaire_hnkparts.png
Manufacturer Name: FRIGIDAIRE
Product Number: 316419388
OEM Part Number: 316419388
Product Description: Overlay

Choose the best Home Appliance parts and supplies from HnKParts!

  • Same Day Shipping

  • Best Quality And Best Price

  • Wide Range of Inventory

  • Best Customer Service

Have More Questions or Need Help to Place The Order?
Reach us at (866)723-0907 or [email protected]

Write Your Own Review
You're reviewing:Frigidaire 316419388 Range Overlay
Your Rating
Customer Questions
What maintenance is required for the Frigidaire 316419388 Overlay?

Regularly wipe the range overlay with a soft, damp cloth to remove spills and debris. Avoid chemicals that can damage the surface. Inspect for scratches or wear, and ensure it remains securely in place to prevent operational hazards.

What are common issues with the Frigidaire 316419388 Overlay?

  • Peeling or fading of the surface finish.
  • Scratches or dents from cookware.
  • Loose or misaligned overlay affecting stove operation.
  • Stains that are difficult to clean if spills sit too long.

Installation Steps

Step1: Turn off power to the range and allow it to cool completely before starting.

Step2: Remove existing control overlay gently using a plastic tool to avoid damage.

Step3: Clean the surface thoroughly to ensure proper adhesion and remove residue.

Step4: Align new overlay carefully with panel markings for accurate fit and positioning.

Step5: Peel backing and press firmly, ensuring no air bubbles remain under surface.

Step6: Restore power and test all controls; keep area dry and avoid moisture.