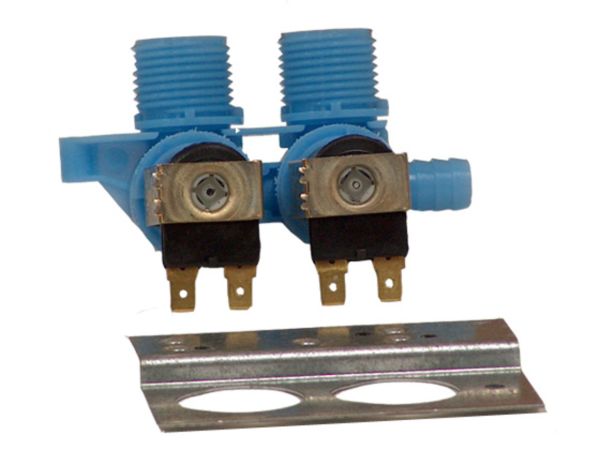
This Part Fits the Following Models (1020)
Whirlpool Washer Water Valve Direct Drive 285805
The Whirlpool Washer Water Valve Direct Drive 285805 is an essential part made to control the water flow in your machine efficiently. This original Whirlpool component guarantees top performance and suitability for a range of washer models. The 285805 water valve, which is made with precision engineering and durability, operates dependably and gives your washer the proper amount of water at each cycle. Because of its robust design, which can survive daily use, it will last for a long time with little upkeep. Replacement may be completed quickly and easily because installation is simple. The 285805 water valve's user-friendly design allows for easy integration with your washer, regaining effective water control for the best possible washing results. The Whirlpool Washer Water Valve Direct Drive 285805 is the ideal choice whether you're changing your washer for better performance or replacing a worn-out valve. Invest in this authentic part and have assurance in Whirlpool's reputation for quality and innovation to guarantee your washer keeps running smoothly and dependably for many years to come. Have with the Whirlpool Washer Water Valve Direct Drive 285805, knowing that all of your laundry needs are covered.
Key Features for the Whirlpool Washer Water Valve Direct Drive 285805:
-
Genuine Whirlpool Part: Ensures compatibility and reliability.
-
Efficient Water Regulation: Facilitates precise water flow during wash cycles.
-
Durable Construction: Crafted with quality materials for long-lasting performance.
-
Easy Installation: User-friendly design for straightforward replacement.
-
Seamless Integration: Suitable with a range of Whirlpool washing models.
-
Optimized Washing: Encourages the economical use of water to achieve optimal cleaning outcomes.
Installation Steps
Step1: Disconnect washer power and water supply to prevent shock.
Step2: Remove rear/top panel to access the old inlet valve assembly.
Step3: Label and disconnect hoses and electrical connectors from valve.
Step4: Unscrew and replace with new valve, ensuring proper alignment.
Step5: Reconnect hoses, wiring, and reassemble panels securely.
Step6: Restore water and power, run test cycle, check for leaks.
