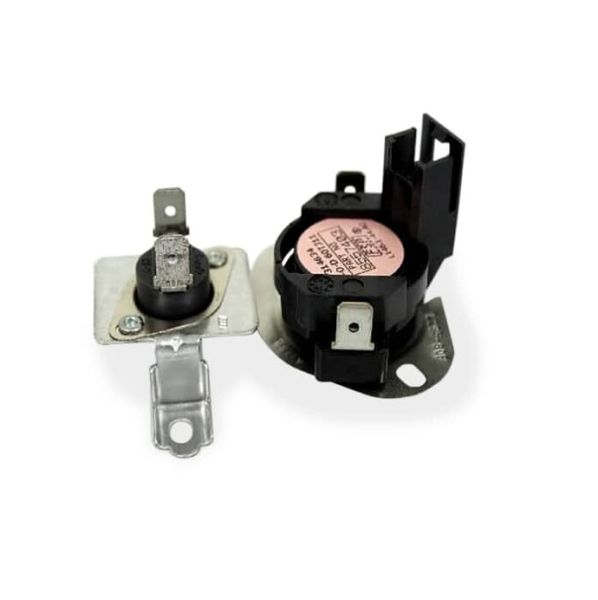
This Part Fits the Following Models (377)
Whirlpool Dryer Thermal Cut Off 280148
The Whirlpool Dryer Thermal Cut Off 280148 plays a pivotal role in safeguarding your dryer against overheating, ensuring its safe and efficient operation. Engineered with precision, this thermal cut off serves as a fail-safe measure by automatically shutting off the heating element if temperatures surpass safe thresholds. Its robust construction guarantees durability, promising prolonged performance for homeowners' peace of mind. Compatible with a range of Whirlpool dryer models, it seamlessly integrates into your appliance, restoring optimal functionality effortlessly. With its proven reliability and effectiveness, the Whirlpool Dryer Thermal Cut Off 280148 stands as a crucial protector, preserving your dryer's integrity and ensuring safety within your household.
Key features of Whirlpool Dryer Thermal Cut Off 280148:
-
Thermal Cut Off 280148 ensures safety by interrupting power if dryer temperatures exceed safe levels.
-
Designed to prevent overheating, it safeguards against potential fire hazards.
-
This component acts as a crucial failsafe, protecting both the appliance and the environment.
-
Easy to install, it seamlessly integrates into Whirlpool dryer systems for efficient operation.
-
With durable construction, it provides long-lasting performance for extended use.
-
Its precise calibration maintains optimal temperature control, enhancing overall dryer efficiency.
Installation Steps
Step 2: The back panel of the dryer should be taken off by loosening the screws located along the borders.
Step 3: The thermal fuse should be identified. It will be positioned on a bracket close to the top of the blower wheel assembly.
Step 4: The two wires attached to the thermal fuse should be gently detached. Ensure it is recalled which wire was linked to each side of the fuse.
Step 5: The defective fuse should be extracted by unscrewing the two screws and taking it out from the bracket.
Step 6: The new 280148 Whirlpool dryer thermal cut off fuse should be placed. Be certain that the two wires are reconnected to their original terminals.
Step 7: The thermal fuse should be tightly and securely fastened back into the bracket.
Step 8: The back panel of the dryer should be reattached and secured with the screws.
Step 9: Power to the dryer should be restored and a test should be performed.
It is important to note that these instructions serve as general guidance and should always be utilized alongside the manufacturer's manual, if available.
