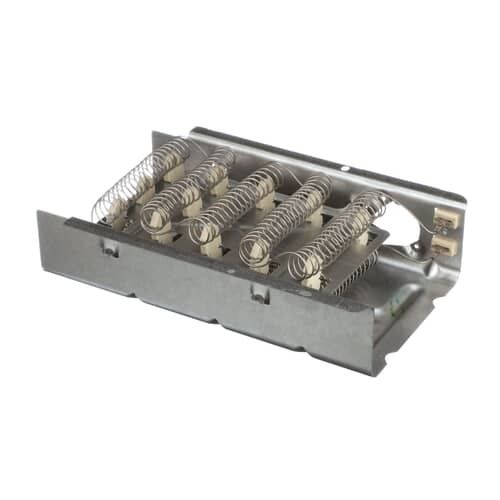
This Part Fits the Following Models (1066)
Whirlpool Dryer Flat Can Heating Element 279838
The Whirlpool Dryer Flat Can Heating Element 279838 is an essential component for optimal drying performance in Whirlpool dryers. Crafted with precision engineering, this heating element ensures efficient heat distribution throughout the drying cycle, effectively drying clothes and fabrics with ease. Designed to fit seamlessly within compatible Whirlpool dryer models, its flat design maximises surface area for improved heat transfer, accelerating the drying process while maintaining energy efficiency.This heating element is designed to resist the rigours of daily use, ensuring dependable performance for years to come. Trust the Whirlpool Dryer Flat Can Heating Element 279838 for exceptional drying results every time.
Key features of Whirlpool Dryer Flat Can Heating Element 279838:
-
High-Quality Materials: Made with long-lasting materials for optimal performance.
-
Even Heat Distribution: Ensures that garments dry uniformly, reducing hot spots and potential damage.
-
Compatible Design: Fits perfectly with Whirlpool dryers, ensuring easy installation and compatibility.
-
Quick Heating: Rapidly heats up to desired temperatures, speeding up the drying process.
-
Reliable Performance: Designed to withstand continuous use without compromising on effectiveness.
-
Energy Efficient: Optimised design minimises energy consumption while delivering optimal drying results.
Installation Steps
Step 2: With the Phillips screwdriver, the screws securing the back panel of the dryer should be taken out. The back panel should be carefully detached from the appliance.
Step 3: The heating element located on the back wall should be identified. It appears as a cylindrical component with two electrodes positioned at each end.
Step 4: The socket wrench should be employed to detach the mounting bolts and the old heating element should be carefully extracted from its mounting position.
Step 5: Any lint or dust surrounding the furnace should be cleared away using a lint brush. It should be ensured to tidy up any other areas where lint may have gathered.
Step 6: The new heating element should be placed into the mount, and the socket wrench should be utilized to fasten it securely.
Step 7: The back panel of the dryer should be reattached with the Phillips screwdriver once more.
Step 8: The dryer should be reconnected to the power source and switched on. It should be verified that the heating element is functioning correctly.
Please note, these instructions serve as general guidance and should always be used alongside the manufacturer's manual, if one is available.
