The store will not work correctly in the case when cookies are disabled.
We collect user information to provide a better user experience and protect the security of our website. By continuing to use our website, you acknowledge the use of cookies.
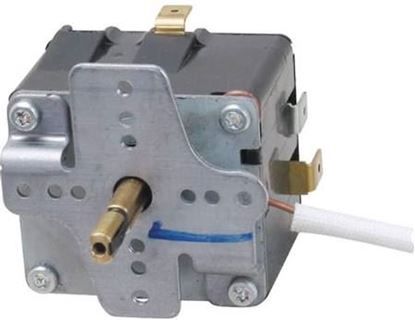
The Peerless-Premier Appliance Co 2167 Range Electric Thermostat K1179 is accurate in controlling the oven temperature to maintain uniformity in the cooking process. It is an electric thermostat that detects the inside heat of the oven and switches the heating elements on or off so that the temperature in the oven remains at the set value. Its purpose is to ensure that it is reliable in thermal control and it is essential in avoiding overheating and undercooking.
Step 1: The oven is disconnected from the electrical outlet and the circuit breaker associated with the oven is deactivated.
Step 2: The oven door is gently opened and the thermostat positioned at the bottom of the unit is found. It will appear as a sizable knob featuring a thermometer.
Step 3: A wrench is employed to detach the wires connected to the thermostat. The connection points are observed for easy reconnection of the new thermostat.
Step 4: The mounting screws that secure the thermostat to the oven are taken out.
Step 5: The new thermostat is placed into the mounting holes and it is fastened with the mounting screws.
Step 6: The wires are reattached to the newly installed thermostat, making sure the connections are firm and secure.
Step 7: The thermostat is fastened by tightening the screws that were previously removed.
Step 8: The circuit breaker is reactivated and the oven is reconnected to the electrical outlet.
Step 9: The thermostat functionality is verified by adjusting the dial on the knob and observing the display to confirm the temperature accuracy.
It is important to remember that these instructions are served as general guidance and should always be utilized alongside the manufacturer's manual, if accessible.