The store will not work correctly in the case when cookies are disabled.
JavaScript seems to be disabled in your browser.
For the best experience on our site, be sure to turn on Javascript in your browser.
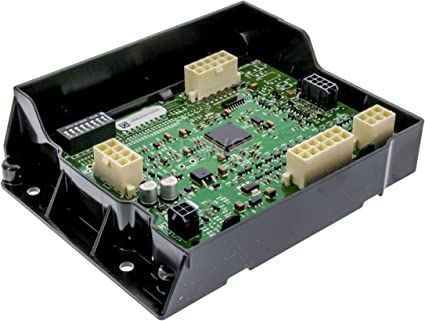
Speed Queen 204163P Washer Hybrid Control Board 6-Timing
Special Price
$179.65
Regular Price
$236.67
In stock
Available Quantity:
10
Product Description
The Speed Queen 204163P Hybrid Control Board 6-Timing is a control system is regulate the laundry cycles with accuracy and speed in the washer. Equipped with a control panel that has six settings for timing and two buttons for selecting the fabric type and the level of soiling respectively. This system makes it possible to combine the advantages of both manual and electronic control of the cleaning process.
✓ This Product Replaces:
204163
https://www.hnkparts.com/media/catalog/product/2/0/204163p_speed-queen_hnkparts.png
This Part Fits the Following Models (1)
No models found matching your search.
Manufacturer Name: SPEED QUEEN Product Number: 204163POEM Part Number: 204163PProduct Description: Control Hybrid Tlw 6
Choose the best Home Appliance parts and supplies from HnKParts ! Have More Questions or Need Help to Place The Order?(866)723-0907 or [email protected]
Installation Steps
Step 1: The power cord should be disconnected prior to starting.Step 2: The two screws situated at the bottom of the control panel should be taken out and placed aside.Step 3: The control panel should be gently pulled away from the appliance and the wiring harness should be disconnected.Step 4: The four screws that secure the Hybrid Control Module should be unscrewed.Step 5: The current module should be removed and the wiring harness should be detached.Step 6: The new module should be positioned and the wiring harness should be connected.Step 7: The new module should be fastened using the four screws that were removed previously.Step 8: The control panel should be reattached and the wiring harness should be reconnected.Step 9: The two screws should be replaced into their original positions at the bottom of the control panel.Step 10: The power cord should be reconnected and the unit's functionality should be checked.