The Speed Queen 203843 Washer Pressure Sensor Switch regulates the pressure of water in the washer and turns on or off the water inlet valve. It operates on the basis of a pressure changes in the water system to enable the washer to fill with the right level of water. It increases efficiency, enhances the accuracy of water usage, and helps avoid problems such as overfilling or underfilling which leads to the proper functioning and durability of the washing machine.
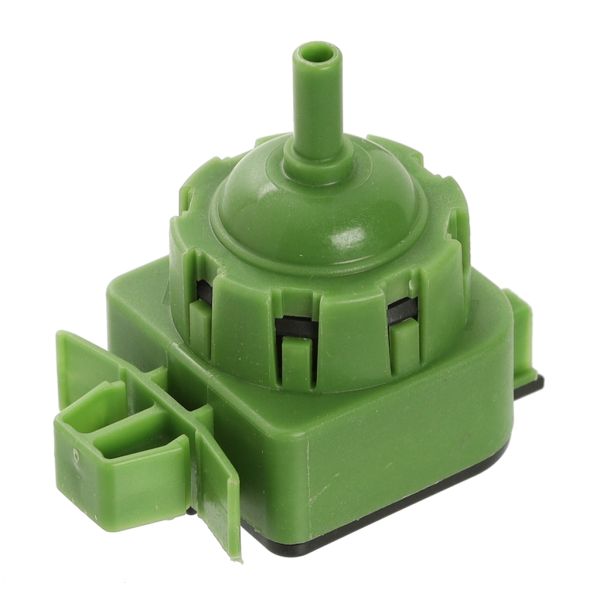
Speed Queen Pressure Sensor Switch (0-400mm H20), Green
The Speed Queen Pressure Sensor Switch (0-400mm H20), Green is a crucial part used to give your appliance accurate pressure monitoring. This authentic Speed Queen part, with green color, guarantees precise measurements in the 0-400mm H20 range. Its precision and long-lasting construction ensure maximum performance and dependability, which helps your appliance run more smoothly. Because of its simple installation design, this pressure sensor switch may be seamlessly integrated into your appliance system without the help of a professional. Its sturdy design guarantees enduring longevity, able to resist the rigors of frequent use for reliable performance. With the Speed Queen Pressure Sensor Switch (0-400mm H20), Green, you can rely on Speed Queen appliances' well-known dependability and quality. Enhance your appliance with this authentic replacement component to keep accurate pressure monitoring, guaranteeing dependable performance and effective functioning with each use. Invest in Speed Queen goods for their quality and dependability, and you'll have confidence knowing that your appliance is made with the best parts out there.
Key Features for the Speed Queen Pressure Sensor Switch (0-400mm H20), Green:
Accurate Monitoring: Provides precise pressure readings within the 0-400mm H20 range, ensuring accurate operation.
Distinctive Green Color: Easily identifiable for quick recognition during installation and troubleshooting.
Genuine Speed Queen Part: Specifically designed for Speed Queen appliances, ensuring compatibility and optimal performance.
Durable Construction: Made from high-quality materials for long-term durability and dependability.
Easy Installation: Designed for straightforward installation, allowing for seamless integration into your appliance system.
Efficient Operation: Contributes to your appliance's efficient functioning by guaranteeing consistent functionality and performance.
Step 1: The required tools and components to replace the Speed Queen 203843 SENSOR,PRESSURE(0-400mm H20) are to be assembled. A Phillips screwdriver, flathead screwdriver, and the new replacement sensor are to be possessed.
Step 2: The machine is to be disconnected from the power source. A Phillips screwdriver is to be used to remove the screws securing the back panel of the washer.
Step 3: The existing sensor is to be identified and detached from the washer. Typically, it will be located near the bottom of the unit and linked to the water pump.
Step 4: The old sensor is to be extracted from the clamp and disposed of.
Step 5: The new sensor is to be positioned where the old one was installed. It is to be securely clamped in place.
Step 6: The wiring harness is to be attached to the new sensor.
Step 7: The back panel of the washer is to be reattached and the machine is to be reconnected to the power supply.
Step 8: The washer's operation is to be verified to confirm that the new sensor is functioning correctly.
It is important to note that these instructions are to serve as general guidance and should always be used alongside the manufacturer's manual, if available.