The store will not work correctly in the case when cookies are disabled.
We collect user information to provide a better user experience and protect the security of our website. By continuing to use our website, you acknowledge the use of cookies.
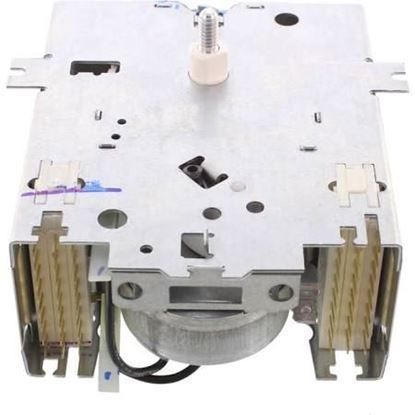
The Speed Queen 203387P Washer Timer is the component that regulates the time and the order of a washing machine’s operations. It operates at 120V and controls four different cycles, and it has a feature that allows for the transition between the wash, rinse, and spin phases. In operation, the timer sets the proper cycles of washing to enhance the efficiency of the appliance for each stage of the washing process.
What maintenance is required for the Speed Queen 203387P Timer?
Regularly inspect the timer for proper operation and ensure control knobs turn smoothly without resistance. Keep the control panel dry and free from moisture to prevent electrical issues. Avoid overloading the washer, as it can pressure the timer. Always disconnect power before checking or handling the component for safety.
What are common issues with the Speed Queen 203387P Timer?
Timer failing to start cycles.
Cycle duration becoming inconsistent.
Washer is stopping mid-cycle.
Program not completing properly.
Installation Steps
Step1: Disconnect the washer from electrical power.
Step2: Remove the control panel screws to access the timer.
Step3: Pull off the timer knob and retaining clip.
Step4: Label and disconnect wires from the old timer.
Step5: Mount the new timer and reconnect the wiring correctly.
Step6: Reassemble the panel and restore power to verify cycles.