The store will not work correctly in the case when cookies are disabled.
We collect user information to provide a better user experience and protect the security of our website. By continuing to use our website, you acknowledge the use of cookies.
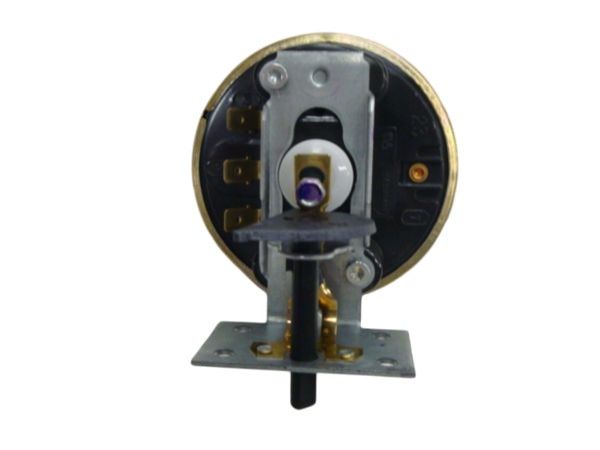
The Speed Queen 201609P Washer Mini Pressure measures the amount of water and pressure in the appliance to make sure that the fill and cycle can work properly. It fits into the Speed Queen washers and communicates with the control system to regulate the amount of water used and ensure the correct functioning. This switch can be used to prevent overflows, maximize the efficiency of the washing process, and ensure the functionality and safety of the appliance because it allows restoring efficient pressure sensing.
Step 1: The washer must be disconnected from the power source to prevent any risk of electric shock.
Step 2: The screws positioned around the top panel must be taken out. They will be found on both sides, with two at the bottom.
Step 3: After the screws are removed, the top panel must be elevated and detached from the unit. This action will enhance visibility of the interior.
Step 4: The pressure-var switch must be identified, situated toward the front of the unit. It may occasionally be obscured by a hose or wiring.
Step 5: The clamps that secure the wires to the unit must be adjusted to release them. The wires must be unplugged prior to the switch being extracted.
Step 6: The switch may be secured by screws on the side or by brackets. These screws or brackets must be loosened accordingly.
Step 7: The Speed Queen 201609P switch must be carefully lifted and extracted from the unit.
Step 8: The new switch must be inserted into the unit, ensuring it is fastened correctly.
Step 9: The wiring must be reattached to the unit and secured with the clamps.
Step 10: The top panel must be reinstalled and fastened with the screws.
Step 11: The washer must be reconnected to the power supply and proper functionality must be verified.
Well done! The Speed Queen 201609P SWITCH,PRESSURE-VAR,MINI has been effectively replaced.
Please note that these instructions serve as general guidance and should always be utilized alongside the manufacturer's manual, when available.