
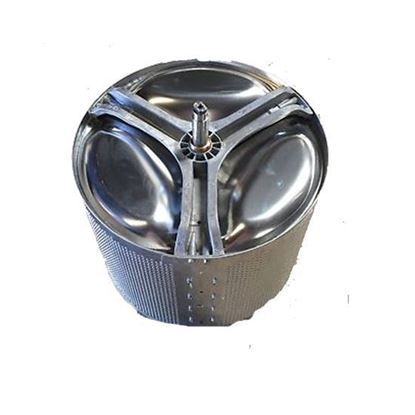
Frigidaire 134963410 Washer Drum Assembly

Special Price $396.31 Regular Price $431.95
Out of stock
Available Quantity:   0
SKU
134963410

Product Description

The Frigidaire 134963410 Washer Drum Assembly used to hold and spin the laundry during the washing process. When water and detergent are added to the drum, the machine rotate to move clothes and clean by washing them. It spin at a high speed during the spin cycle to throw out water and cut down on the drying time. This drum assembly improves the washing performance and longevity of the appliance and reduces the noise for a better wash experience.
Manufacturer

https://www.hnkparts.com/media/catalog/product/1/3/134963410_frigidaire_hnkparts.jpg

This Part Fits the Following Models (8)

Manufacturer Name: FRIGIDAIRE
Product Number: 134963410
OEM Part Number: 134963410
Product Description: Drum Assy (Lp)

Choose the best Home Appliance parts and supplies from HnKParts!

  • Same Day Shipping

  • Best Quality And Best Price

  • Wide Range of Inventory

  • Best Customer Service

Have More Questions or Need Help to Place The Order?
Reach us at (866)723-0907 or [email protected]

Write Your Own Review
You're reviewing:Frigidaire 134963410 Washer Drum Assembly
Your Rating
Customer Questions
What maintenance is required for the Frigidaire 134963410 Drum Assembly?

Regularly clean the washer drum interior to remove detergent residue and debris buildup. Avoid overloading the washer to reduce stress on the drum. Inspect for unusual noises or imbalance. Proper maintenance ensures efficient spinning performance and assists in avoiding excessive vibration or component strain.

What are common issues with the Frigidaire 134963410 Drum Assembly?

  • Excessive noise during spin cycles.
  • Washer drum not spinning or spinning unevenly.
  • Vibration or imbalance during operation.
  • Damage to the spin basket.
  • Water not extracting properly from clothes.

Installation Steps

Step1: Disconnect power and shut off water supply before starting.

Step2: Remove the washer top and front panels to access the tub.

Step3: Detach belt, pulley, and internal connections from the drum.

Step4: Lift out the old drum assembly from the housing.

Step5: Place the new drum assembly into position securely.

Step6: Reconnect all components, ensuring proper alignment.

Step7: Reassemble panels, restore utilities, and run a test cycle.