
$8.26
In stock
Available Quantity:
10
SKU
131362400
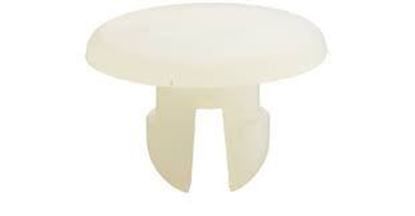
The Frigidaire 131362400 Dryer Push-in Fastener will securely attach parts when assembling a dryer. It is meant to be fitted into designated slots for a quick and secure attachment without the need for tools. It is inserted once and ensures that components stay in place and will not shift or detach during operation. This fastener helps the dryer to have a more stable performance which in turn promotes its durability and efficiency. This ensures the parts are aligned and prevents the loose parts from causing damage.
Manufacturer

This Part Fits the Following Models (375)
White-Westinghouse WLSG62RFW4 Washer/Dryer Combo
White-Westinghouse WLSG62RFW0 (V2) Washer/Dryer Combo
White-Westinghouse SWXG831HS4 Laundry Center
White-Westinghouse WLSG62RFD0 (V1) Washer/Dryer Combo
White-Westinghouse WLSG62RFW5 Washer/Dryer Combo
White-Westinghouse WLXG42RED0 (V1) Washer/Dryer Combo
White-Westinghouse WLXG42REW3 Washer/Dryer Combo
White-Westinghouse WLXG42REW0 (V2) Washer/Dryer Combo
White-Westinghouse WLXG42REW4 Washer/Dryer Combo
White-Westinghouse WLXG42REW5 Washer/Dryer Combo
White-Westinghouse SWXG831DQ0 Laundry Center
White-Westinghouse SWSG1031HS4 Laundry Center
White-Westinghouse SWSG1031HS2 Laundry Center
White-Westinghouse SWSG1031HS0 Laundry Center
White-Westinghouse SWSG1031HQ4 Laundry Center
Showing 1-15
of 375
| Manufacturer Name: FRIGIDAIRE Product Number: 131362400 OEM Part Number: 131362400 Product Description: Push-In Fastener |
Choose the best Home Appliance parts and supplies from HnKParts!
Same Day Shipping
Best Quality And Best Price
Wide Range of Inventory
Best Customer Service
Have More Questions or Need Help to Place The Order?
Reach us at (866)723-0907 or [email protected]
Write Your Own Review
Customer Questions
Installation Steps
Step1: Disconnect washer power.
Step2: Align fastener with panel hole.
Step3: Push firmly until it locks.
Step4: Ensure secure fit, no looseness.
Step5: Restore power and test carefully.
Step6: Wear gloves to avoid injury.
Step7: Ensure washer is unplugged before starting installation.
Step8: Avoid forcing part to prevent damage.
Step9: Check alignment after installation.
