The store will not work correctly in the case when cookies are disabled.
We collect user information to provide a better user experience and protect the security of our website. By continuing to use our website, you acknowledge the use of cookies.
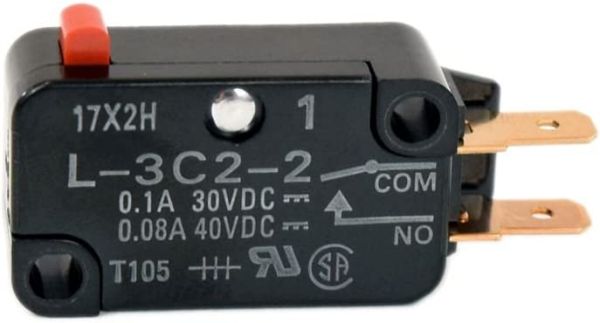
The Bosch 12038730 Door Switch Kit regulates the power supply when the door is opened or closed in the microwave. This feature helps to operate only when the door is closed by identifying its position. Operates by shortening the circuit to the control board to prevent the door from being opened accidentally. Allows the switch to operate optimally while protecting from overheating and increases safety and the appliance’s durability.
The Bosch Microwave Switch Kit 12038730, is a flexible and necessary component for maximum performance and safety. This kit comes with everything you need to easily replace worn-out or malfunctioning switches and get your microwave operating again. The switches are made with exact engineering and are intended to satisfy Bosch's exacting quality requirements, ensuring over time dependability and durability. Because of the user-friendly design and clear instructions, installation is simple, making it suitable for both professionals and consumers. You can replace a switch with assurance and save time by using this kit rather than buying expensive repairs or replacements. Knowing that your Bosch microwave is fitted with authentic replacement components to preserve its longevity and efficiency will help you to maintain your microwave, get the Bosch Microwave Switch Kit 12038730.
Key features of Bosch Microwave Switch Kit 12038730
Right and Left Switch Holders: These holders house the various switches used to control your microwave.
Monitor Switch: This switch is responsible for monitoring the door and ensuring the microwave only operates when it's closed.
Door Switches (2x): These switches detect when the microwave door is opened or closed, triggering the safety features that prevent the microwave from operating when open.
Lever: This lever is likely part of the door switch assembly and plays a role in detecting the door's open and closed position.
20 Amp Fuse: This fuse helps protect your microwave from electrical surges.
What maintenance is required for the Bosch 12038730 Door Switch Kit?
Regular inspection ensures the door switch operates correctly and engages when the microwave door closes. Keep the surrounding area clean and free of debris to prevent obstruction or misalignment. Avoid applying excessive force to the door mechanism, as it can damage internal contacts. If malfunction occurs, replacement rather than repair is typically recommended for safety and reliability.
What are common issues with the Bosch 12038730 Door Switch Kit?
Microwave fails to start when door is closed.
Intermittent power or shuts off unexpectedly.
Door latch not registering properly.
Arcing or burnt contacts inside the switch.
Inconsistent door sensor response causing operational errors.
Installation Steps
Step1: Unplug microwave for safety and ensure power is fully isolated.
Step2: Remove outer cover to access old door switch assembly and keep screws organized.
Step3: Note wiring positions, then disconnect faulty switch carefully and avoid pulling wires.
Step4: Install new switch in same orientation ensuring proper alignment and secure seating.
Step5: Reconnect wires securely and check tight terminals, ensuring no loose connections.
Step6: Reassemble unit and test door interlock before use, confirming safe operation.