Whirlpool 12002022 Washer Lip Seal Kit

Special Price $65.91 Regular Price $84.88
In stock
Available Quantity:   79
SKU
12002022

Product Description

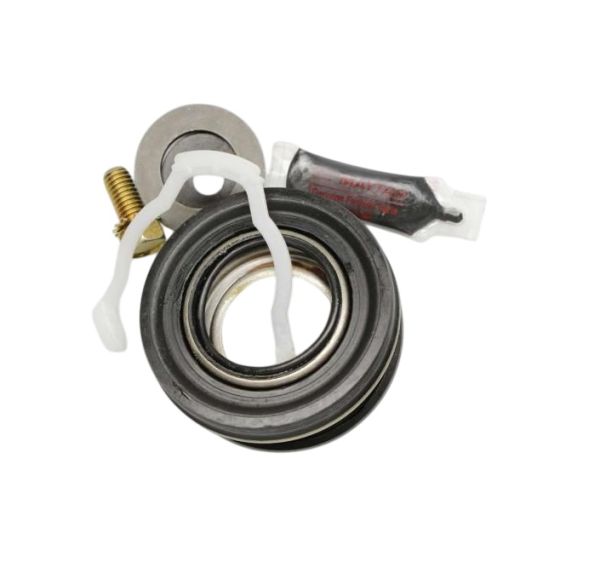
The Whirlpool 12002022 Washer Lip Seal Kit prevents the leakage of water around the drum shaft and assists in keeping the seal of the water tight. It's a tight fit around the rotating shaft which holds water in the tub and allows it to rotate freely. It operates together with the bearing assembly in the designated sealing groove. It is a lip seal kit that is used to ensure a smooth functioning of the system, eliminate any leakage and is used to restore the necessary work.
10.6"X13.8"X2.7"
Manufacturer
✓ This Product Replaces: 12001478, 22002029
https://www.hnkparts.com/media/catalog/product/1/2/12002022-13870.jpg

This Part Fits the Following Models (112)

Maytag MLG2000AWW Appliance Center Maytag MLG2000AXW Appliance Center Maytag MAH3000AAW Washer Maytag MAH3000AEW Washer Maytag MAH3000AGW Washer Maytag MAH3000AKW Washer Maytag MAH3000AWA Washer Maytag MAH3000AWQ Washer Maytag MAH3000AWW Washer Maytag MAH3000BGW Washer Maytag MAH4000AWQ Washer Maytag MAH4000AWW Washer Maytag MAH4000BWQ Washer Maytag MAH4000BWW Washer Maytag MAH5500AWW Washer
Showing 1-15 of 112
NON-Wiseable. LIP SEAL KIT
Write Your Own Review
You're reviewing:Whirlpool 12002022 Washer Lip Seal Kit
Your Rating
Customer Questions
No Questions

Installation Steps

Step 1: The power supply to your Whirlpool Washer should be disconnected. The washer's plug should be removed from the wall socket and any fuses or circuit breakers associated with it should be disabled.

Step 2: Any residual water from the washer's tub should be drained. To accomplish this, the washer should be tilted onto its side and the bottom panel should be cautiously detached.

Step 3: The three screws located at the base of the washer that secure the lip seal should be removed. After these screws are taken out, the lip seal will be able to be extracted from the washer.

Step 4: Prior to placing the new lip seal, it should ensure that the area designated for the lip seal is devoid of dirt, debris, and other impurities. If any contaminants are found, a wet/dry vacuum or compressed air should be utilized to eliminate them.

Step 5: After the area is cleaned, the new lip seal should be inserted into the washer's recess and fastened using the three screws. It should ensure that they are tightened adequately, but not excessively.

Step 6: The bottom panel should be reattached and the washer should be returned to its upright position. The washer should be reconnected and power to it should be restored. It should be verified that the washer operates correctly with the new seal in place.

Please remember that these instructions are served as general guidance and should always be utilized alongside the manufacturer's manual, if available.