
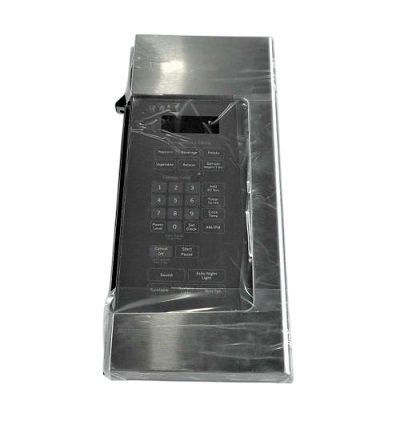
General Electric WB56X20847 Oven Control Panel Assembly

Special Price $71.19 Regular Price $87.95
In stock
Available Quantity:   1
SKU
WB56X20847

Product Description

The General Electric WB56X20847 Control Panel Assembly makes it easy to operate the oven by offering accessible. It is used to contain the basic control buttons and display options that can be used to set temperatures, cooking options, and time easily. This feature makes it easier to use and convenient to get the right results when cooking. Durability makes it possible to have long-lasting equipment while the ease of installation makes it possible to have little time out of service.
Stove & Oven Parts, Control Panels,
17.9"X8.9"X4.5"
Manufacturer
https://www.hnkparts.com/media/catalog/product/w/b/wb56x20847-55904.jpg

This Part Fits the Following Models (1)

Write Your Own Review
You're reviewing:General Electric WB56X20847 Oven Control Panel Assembly
Your Rating
Customer Questions
What maintenance is required for the General Electric WB56X20847 Control Panel Assembly?

Keep the oven control panel clean by gently wiping it with a soft, damp cloth and avoiding harsh chemicals that can damage the surface or electronics. Ensure the oven is powered off before cleaning to prevent electrical hazards. Regularly inspect for loose connections or moisture buildup behind the panel.

What are common issues with the General Electric WB56X20847 Control Panel Assembly?

  • Unresponsive or intermittently functioning touch controls.
  • Display malfunctions such as fading, flickering, or blank screen.
  • Buttons sticking or not registering input.
  • Electrical connection faults causing loss of power to the panel.
  • Error codes appearing due to communication issues with the oven control system.

Installation Steps

Step1: Turn off power at breaker and ensure oven is cool; verify no electricity.

Step2: Remove mounting screws from old control panel trim carefully.

Step3: Carefully disconnect ribbon cable and wiring harness; avoid damage.

Step4: Align and connect new control panel assembly securely.

Step5: Secure panel with screws and restore power after checking fit.

Step6: Test functions for proper operation and safety checks.

Step7: Ensure all screws are tight and no error codes appear.
