
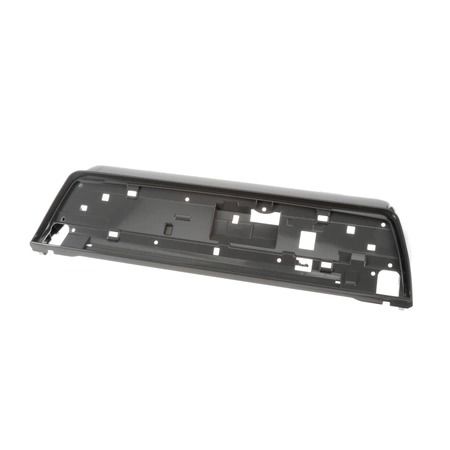
Whirlpool W11413337 Washer Console

Special Price $124.93 Regular Price $138.95
In stock
Available Quantity:   25
SKU
W11413337

Product Description

The Whirlpool W11413337 Washer Console makes it simple for the users to choose the wash cycles and settings, and even check on the progress of the wash. It works by sending user commands to the washer’s internal system, making it simple to control the temperature of water, the speed of spinning and the time taken to complete a cycle. It is built to last and enhances the performance of the appliance and makes laundry work easier and more efficient.
Console,
Manufacturer
https://www.hnkparts.com/media/catalog/product/w/1/w11413337-55204.jpg
Manufacturer Name: WHIRLPOOL
Product Number: W11413337
OEM Part Number: W11413337
Product Description: Console

Choose the best Home Appliance parts and supplies from HnKParts!

  • Same Day Shipping

  • Best Quality And Best Price

  • Wide Range of Inventory

  • Best Customer Service

Have More Questions or Need Help to Place The Order?
Reach us at (866)723-0907 or [email protected]

Write Your Own Review
You're reviewing:Whirlpool W11413337 Washer Console
Your Rating
Customer Questions
What maintenance is required for the Whirlpool W11413337 Console?

Keep the washer console clean by wiping it with a soft, damp cloth to prevent buildup of detergent residue and dust. Avoid excessive moisture to protect internal electronics. Inspect buttons and controls regularly for responsiveness. Ensure proper electrical connections for safe operation.

What are common issues with the Whirlpool W11413337 Console?

  • Unresponsive or stuck buttons during operation.
  • Display not lighting up or showing incorrect information.
  • Intermittent control panel functionality.
  • Failure to communicate with washer control board.
  • Error codes appearing due to internal faults.

Installation Steps

Step1: Unplug the washer and turn off water supply for safety.

Step2: Remove screws securing the old console and gently lift it off.

Step3: Disconnect the wire harness carefully without pulling wires.

Step4: Connect and align the harness to the new console securely.

Step5: Reinstall and tighten screws firmly.

Step6: Restore power and test functionality before regular use.
