
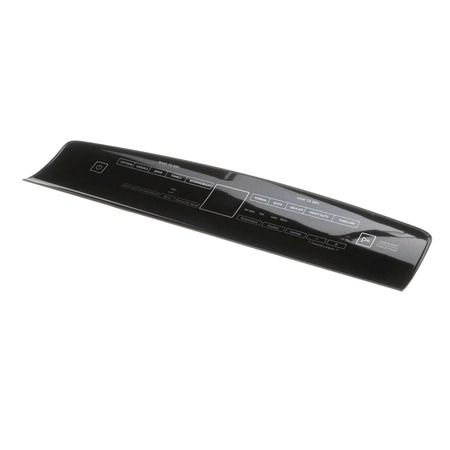
Whirlpool W11124268 Dryer Console

Special Price $165.41 Regular Price $225.62
Out of stock
Available Quantity:   0
SKU
W11124268

Product Description

The Whirlpool W11124268 Console is a control panel of dryers that helps in controlling the settings and also in monitoring the drying cycles. Designed with buttons, knobs, and a display located to enable them to choose various modes and options depending on the type of fabric or the number of clothes being dried. Operates through establishing a link with the dryer's internal system and enabling it to interact with the machine for effective drying. The advantages of this console include smooth functioning and improved control of the drying operations.
Console,
Manufacturer
https://www.hnkparts.com/media/catalog/product/w/1/w11124268-41567.jpg
Manufacturer Name: WHIRLPOOL
Product Number: W11124268
OEM Part Number: W11124268
Product Description: Console

Choose the best Home Appliance parts and supplies from HnKParts!

  • Same Day Shipping

  • Best Quality And Best Price

  • Wide Range of Inventory

  • Best Customer Service

Have More Questions or Need Help to Place The Order?
Reach us at (866)723-0907 or [email protected]

Write Your Own Review
You're reviewing:Whirlpool W11124268 Dryer Console
Your Rating
Customer Questions
What maintenance is required for the Whirlpool W11124268 Console?

Regularly wipe down the console with a soft, damp cloth to remove dust and lint buildup. Avoid harsh chemicals that can damage the surface or buttons. Check for loose knobs or connections periodically, ensuring safe and consistent operation. Always unplug the dryer before cleaning.

What are common issues with the Whirlpool W11124268 Console?

  • Unresponsive or sticky control buttons.
  • Display or indicator lights failing to work.
  • Error codes appearing unexpectedly.
  • Loose or broken knobs and switches.
  • Inconsistent dryer cycle selection.

Installation Steps

Step1: Disconnect power supply to prevent electric shock.

Step2: Remove existing console cover screws carefully.

Step3: Align new console with control interface connectors.

Step4: Secure console and reconnect wiring harness.

Step5: Restore power and test dryer functions.

Step6: Verify compatibility and secure mounting clips before reassembly.

Step7: Check alignment and tighten all screws evenly.
