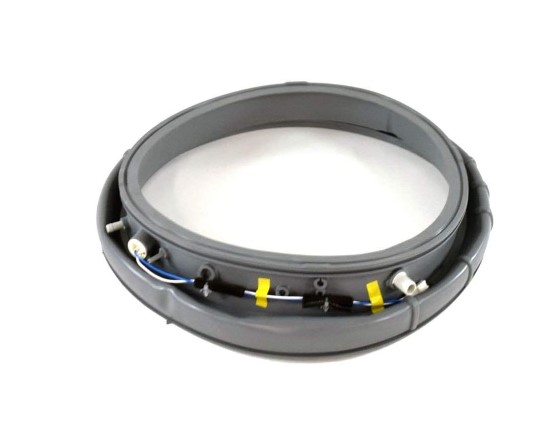

Samsung DC97-16140G Washer Washer Door Boot Diaphragm
Description
The Samsung DC97-16140G is a critical component manufactured exclusively for Samsung washers. It is a washer door boot diaphragm that provides a critical seal between the washer's drum and the outer tub. To stop water leaks throughout the washing cycle, this seal is crucial. A worn or damaged diaphragm can lead to leaks, noise, and even washer malfunction. Replacing the diaphragm with the Samsung DC97-16140G creates a perfect seal, restoring optimal washing performance and preventing water damage to your laundry area and washer. This genuine Samsung item is critical to the performance and lifespan of your Samsung washing machine.
| Manufacturer Name: Samsung Product Number: DC97-16140G OEM Part Number: DC97-16140G Product Description: Washer Door Boot Diaphragm |
Choose the best Home Appliance parts and supplies from HnKParts!
Same Day Shipping
Best Quality And Best Price
Wide Range of Inventory
Best Customer Service
Have More Questions or Need Help to Place The Order?
Reach us at (866)723-0907 or [email protected]
Step 2: The screws that hold the back panel to the interior of the washer should be detached and the panel should be placed aside.
Step 3: The drum assembly should be gently pulled out to gain access to the pump and motor.
Step 4: The existing DC97-16140G door boot diaphragm gasket assembly should be identified and extracted by softly tugging on both ends of the assembly.
Step 5: The side of the gasket that is oriented upwards should be observed and compared to the new gasket.
Step 6: The new DC97-16140G door boot diaphragm gasket assembly should be positioned, making sure it is correctly seated and the hose opening is properly aligned.
Step 7: The assembly should be fastened with the provided hardware and the back panel should be reinstalled.
Step 8: The washer should be reconnected, a test cycle should be conducted, and your newly repaired washer should be relished!
It is important to remember that these instructions are served as general guidance and should always be utilized alongside the manufacturer's manual, if one is available.
Customer Reviews
No reviews yet. Be the first to write one!
Write a Review
We strive to provide our customers with a hassle-free and efficient shopping experience. Our shipping policy ensures the timely delivery of your orders and complete customer satisfaction. View More
We are committed to ensuring your complete satisfaction with every purchase. We understand that circumstances may arise where you must return a product or request a refund. If for any reason you are not satisfied, you may return the item(s) according to the terms outlined below. View More
This Payment Policy outlines the terms and conditions governing all payments made for products purchased through our website. By making a purchase, you agree to be bound by this Payment Policy. View More